Difference between revisions of "Powder Coating Area"
(→Tips) |
|||
| (37 intermediate revisions by the same user not shown) | |||
| Line 1: | Line 1: | ||
| − | [[File:Level 2 badge.png|alt=Level 2 badge used at Pikes Peak Makerspace|left|frameless| | + | '''All of our Powder Coating Equipment at Pikes Peak Makerspace (PPM) combined occupies about 90 square feet (6'x18').''' |
| − | + | <br> | |
| − | + | <br> | |
| + | [[File:Level 2 badge.png|alt=Level 2 badge used at Pikes Peak Makerspace|left|frameless|90x90px|PPM TRAINING REQUIRED]] | ||
| + | The Powder Coating Area within our Metal Shop at Pikes Peak Makerspace (PPM) consists mostly of Level 2 equipment. | ||
Additional PPM training is required to use any of our Level 2 equipment. | Additional PPM training is required to use any of our Level 2 equipment. | ||
| − | + | '''Powder Coating Area''' hand tools should be marked with <span style="color:#EB4F9C">'''pink'''</span> tape, paint, or powder coating (!) | |
| − | + | <br> | |
| − | Powder Coating Area hand tools should be marked with <span style="color:#EB4F9C">'''pink'''</span> tape, paint, or powder coating (!) | + | <br> |
| + | '''''Always leave the space better than you found it.''''' | ||
<br> | <br> | ||
| + | <br> | ||
| + | '''Links to related PPM Wiki pages:''' | ||
| + | :[[Sandblasting Cabinet|<span style="color:#FFFFFF; background:#EB4F9C"> '''Metal Shop — Sandblasting Cabinet''' </span>]] | ||
<br> | <br> | ||
{{Template:Contact Us}} | {{Template:Contact Us}} | ||
| Line 17: | Line 23: | ||
<br> | <br> | ||
<p style="padding:0.2em 0.4em; background:#EB4F9C; color:#FFFFFF; font-size:15%;"> </p> | <p style="padding:0.2em 0.4em; background:#EB4F9C; color:#FFFFFF; font-size:15%;"> </p> | ||
| − | ==Classes | + | ==Classes== |
| − | + | : PPM announces its [https://www.meetup.com/pikespeakmakerspace/events/ '''Upcoming events, including classes, on Meetup'''] | |
| + | :To help out in the Powder Coating Area contact us on Slack. | ||
| − | === | + | ==Training== |
| − | |||
| − | |||
| − | |||
| − | === | + | :'''[https://www.youtube.com/watch?v=wSBAT3jKJLk&list=PL8UO6Tbfghxj5amWX_yr1O6C6jxqUYOSx&index=1 How to Powder Coat]''' — Eastwood |
| + | :'''[https://www.prismaticpowders.com/shop/powder-coating-collections POWDER COATING COLLECTIONS]''' — PRISMATIC POWDERS | ||
| − | * '''Max part size to powder coat is 36"x45"x91"''' | + | ==='''Part prep'''=== |
| − | + | *'''Max part size to powder coat is 36"x45"x91"''' | |
| − | |||
*'''Remove anything off the part that can’t handle 400°F''' | *'''Remove anything off the part that can’t handle 400°F''' | ||
*Part must be clean and degreased to prevent contamination of media | *Part must be clean and degreased to prevent contamination of media | ||
*Sandblasting part first gives more grip for the powder to stick to and last longer | *Sandblasting part first gives more grip for the powder to stick to and last longer | ||
| − | *If the part has been sandblasted, bake the part in the oven at 180°F until the part reaches temp to degas and discharge part. Then allow to cool. | + | * If the part has been sandblasted, bake the part in the oven at 180°F until the part reaches temp to degas and discharge part. Then allow to cool. |
*Tape anything off with high temp tape (PET, Kapton, Fiberglass) that you don’t want to be powered coated | *Tape anything off with high temp tape (PET, Kapton, Fiberglass) that you don’t want to be powered coated | ||
*Once the part is cleaned and discharged do not touch part with your hands | *Once the part is cleaned and discharged do not touch part with your hands | ||
| − | ===Powder coat gun prep=== | + | === Powder coat gun prep === |
*'''Make sure the gun is completely clean''' by blowing off any powder off and in the gun with air compressor | *'''Make sure the gun is completely clean''' by blowing off any powder off and in the gun with air compressor | ||
| Line 43: | Line 47: | ||
*Only fill bottle 2in, NO MORE. The bottle needs air circulation to work properly. | *Only fill bottle 2in, NO MORE. The bottle needs air circulation to work properly. | ||
*Set gun to high voltage for most things for the first coat and use low voltage for very small parts or second coats | *Set gun to high voltage for most things for the first coat and use low voltage for very small parts or second coats | ||
| − | *Set gun PSI to 3-5 PSI | + | * Set gun PSI to 3-5 PSI |
===Powder coating=== | ===Powder coating=== | ||
| Line 49: | Line 53: | ||
*'''Place part on rack or hang from rack using stainless steel hooks or wire''' | *'''Place part on rack or hang from rack using stainless steel hooks or wire''' | ||
*Connect ground wire to rack or wire | *Connect ground wire to rack or wire | ||
| − | *Check ground by moving powder coat gun close to part (1-2in) and push power button to verify there electricity aches to the part. If not, adjust ground until you have a strong arch. | + | * Check ground by moving powder coat gun close to part (1-2in) and push power button to verify there electricity aches to the part. If not, adjust ground until you have a strong arch. |
*Hold button and spray powder 6-8 inch away in a circular motion around part until the part is evenly coated. | *Hold button and spray powder 6-8 inch away in a circular motion around part until the part is evenly coated. | ||
| − | *Start coating the parts that are deep and have 90 degree angles (low voltage may help if it’s not sticking) then coat the rest at high voltage | + | * Start coating the parts that are deep and have 90 degree angles (low voltage may help if it’s not sticking) then coat the rest at high voltage |
*Check evenness with led light | *Check evenness with led light | ||
*If air from the gun is blowing powder off part PSI is too high | *If air from the gun is blowing powder off part PSI is too high | ||
| Line 59: | Line 63: | ||
===Baking part=== | ===Baking part=== | ||
| − | *'''Preheat oven''' to the temperature specified for the powder | + | *'''Preheat oven''' to the temperature specified for the powder |
| − | *Place part in the oven being careful not to knock off any powder from part | + | *Place part in the oven being careful not to knock off any powder from part |
| − | *Measure the temp of the part until its at the specified temp for the powder being used (using IR thermometer) | + | *Measure the temp of the part until its at the specified temp for the powder being used (using IR thermometer) |
| − | *Once the part has reached temp bake the part for the specified time for the powder being used | + | *Once the part has reached temp bake the part for the specified time for the powder being used |
| − | *Carefully remove the part from the oven and allow it to cool down before handling | + | *Carefully remove the part from the oven and allow it to cool down before handling |
| − | *To add a second coat, coat part hot at 180°F with good ground and on low voltage and rebake | + | * To add a second coat, coat part hot at 180°F with good ground and on low voltage and rebake |
| − | |||
| − | |||
| − | |||
| − | |||
==Equipment Lists== | ==Equipment Lists== | ||
| Line 78: | Line 78: | ||
|Item | |Item | ||
|Manufacturer | |Manufacturer | ||
| − | | | + | |Power<br>Requirements |
|Resources | |Resources | ||
|- | |- | ||
| Line 92: | Line 92: | ||
'''paint booth''' | '''paint booth''' | ||
| | | | ||
| − | | | + | | |
| | | | ||
|- | |- | ||
| Line 101: | Line 101: | ||
'''with PID controller''' | '''with PID controller''' | ||
|Trevor Banks | |Trevor Banks | ||
| − | | | + | | |
| | | | ||
|- style="font-weight:bold; text-align:center; font-family:Arial, Helvetica, sans-serif !important; color:#000000;" | |- style="font-weight:bold; text-align:center; font-family:Arial, Helvetica, sans-serif !important; color:#000000;" | ||
| Line 110: | Line 110: | ||
| | | | ||
|} | |} | ||
| − | |||
===Hand Tools=== | ===Hand Tools=== | ||
| Line 118: | Line 117: | ||
|Item | |Item | ||
|Manufacturer | |Manufacturer | ||
| − | |Model | + | |Model Number |
|- | |- | ||
|[[File:IR Thermometer.jpg|alt=IR Thermometer|center|frameless|133x133px]] | |[[File:IR Thermometer.jpg|alt=IR Thermometer|center|frameless|133x133px]] | ||
| Line 136: | Line 135: | ||
|} | |} | ||
| − | :'''Powder Coating Area''' hand tools should be marked with <span style="color:#EB4F9C">'''pink'''</span> tape or paint or powder coating. | + | :☐ '''Powder Coating Area''' hand tools should be marked with <span style="color:#EB4F9C">'''pink'''</span> tape or paint or powder coating. |
| − | |||
| − | |||
| − | + | :☐ Return all tools to their proper location after use. This rule applies to all areas of our Makerspace. | |
| − | : | ||
==Benefits== | ==Benefits== | ||
{{Member Benefits}} | {{Member Benefits}} | ||
| − | == Materials == | + | ==Materials== |
'''Powder Coating Powders''' | '''Powder Coating Powders''' | ||
{| class="wikitable" | {| class="wikitable" | ||
| Line 227: | Line 223: | ||
: | : | ||
| − | == Policies == | + | == Policies== |
{{Red Tags}} | {{Red Tags}} | ||
| − | == | + | ==Additional Help== |
| − | |||
| − | |||
| − | |||
| − | |||
| − | |||
| − | |||
| − | |||
| − | |||
| − | |||
'''Links to related PPM Wiki pages:''' | '''Links to related PPM Wiki pages:''' | ||
| − | |||
:[[Metal_Shop — CNC SHOPMASTER|<span style="color:#FFFFFF; background:#EB4F9C"> '''Metal Shop — CNC SHOPMASTER''' </span>]] | :[[Metal_Shop — CNC SHOPMASTER|<span style="color:#FFFFFF; background:#EB4F9C"> '''Metal Shop — CNC SHOPMASTER''' </span>]] | ||
:[[Welding_Area|<span style="color:#FFFFFF; background:#EB4F9C"> '''Metal Shop — Welding Area''' </span>]] | :[[Welding_Area|<span style="color:#FFFFFF; background:#EB4F9C"> '''Metal Shop — Welding Area''' </span>]] | ||
:[[Metal_Shop|<span style="color:#FFFFFF; background:#EB4F9C"> '''Metal Shop''' </span>]] | :[[Metal_Shop|<span style="color:#FFFFFF; background:#EB4F9C"> '''Metal Shop''' </span>]] | ||
| − | :[[Wood_Shop|<span style="color:#FFFFFF; background:# | + | |
| − | :[[Vented_Room|<span style="color:#FFFFFF; background:# | + | :[[Wood_Shop|<span style="color:#FFFFFF; background:#3DA942"> '''Wood Shop''' </span>]] |
| − | :[[Shed|<span style="color:#FFFFFF; background:# | + | |
| + | :[[Vented_Room|<span style="color:#FFFFFF; background:#0F99D7"> '''Vented Room''' </span>]] - '''[https://pikespeakmakerspace.org/reserve make a reservation]''' | ||
| + | |||
| + | :[[Shed|<span style="color:#FFFFFF; background:#766FAF"> '''Shed''' </span>]] | ||
:'''[[QR Codes]]''' | :'''[[QR Codes]]''' | ||
| − | + | Use the PPM Slack channel #powder-coating or #metal-shop | |
| − | + | ||
| − | + | Note that we have a Slack channel (#job-board) for members to post, discuss, or accept job opportunities either within PPM or from the community. | |
| − | + | ||
| − | |||
| − | |||
| − | |||
| − | |||
{{Template:Footer}} | {{Template:Footer}} | ||
| − | |||
<p style="padding:0.2em 0.4em; background:#EB4F9C; color:#FFFFFF; font-size:15%;"> </p> | <p style="padding:0.2em 0.4em; background:#EB4F9C; color:#FFFFFF; font-size:15%;"> </p> | ||
<!--Metalshop Woodshop--> | <!--Metalshop Woodshop--> | ||
Latest revision as of 10:52, 8 April 2025
All of our Powder Coating Equipment at Pikes Peak Makerspace (PPM) combined occupies about 90 square feet (6'x18').
The Powder Coating Area within our Metal Shop at Pikes Peak Makerspace (PPM) consists mostly of Level 2 equipment.
Additional PPM training is required to use any of our Level 2 equipment.
Powder Coating Area hand tools should be marked with pink tape, paint, or powder coating (!)
Always leave the space better than you found it.
Links to related PPM Wiki pages:
Contact Us if you cannot find your answer here on our Wiki or if you notice any information that is outdated.
Safety First
Members must know the following information:
- In case of emergency, call 911.
- Our physical location is:
- 735 East Pikes Peak Avenue
- Colorado Springs, CO 80903
IN CASE OF
EMERGENCY
sign

PPM Fire Escape Plan
- Fire Escape Plan maps are posted throughout the Makerspace.
- There are 7 fire extinguishers on the fire escape plan map. Review the PPM Fire Escape Plan for locations.
PPM Emergency
Evacuation Plan.pdf
PPM Fire
Prevention Plan.pdf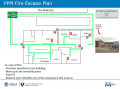
PPM Fire Escape
Plan

First Aid
- There is a FIRST AID Supply Cabinet in our Kitchen Area.
- FIRST AID Kits are available in four areas: the Kitchen, Metal Shop, Wood Shop and CNC Room.
FIRST AID
Supply Cabinet
FIRST AID
Kit


Eye Wash Stations
- Emergency Eye & Face Wash Stations are mounted in four areas: the Kitchen, Wood Shop, CNC Room and Vented Room.
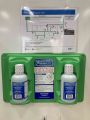
Emergency
Eye & Face Wash
Station

Personal Protective Equipment (PPE)
- Wear protective equipment in all Wood and Metal Shop Areas.
- Wear gloves when using Isopropyl Alcohol and other cleaners.
- Gloves should not be worn when using powered equipment (saws, jointers, drills, or other equipment). Leather gloves can be worn for handling materials, but not when operating machinery.
Personal Protective Equipment (PPE)

Hazardous Chemicals
- All hazardous chemicals must be stored in the yellow hazardous chemical storage cabinet located in the Vented Room.
- Review the Safety Data Sheet (SDS) information of unknown products before use.
- SDS information is available via the QR code on the hazardous chemical storage cabinet or this spreadsheet.
- Do not bring dangerous chemicals to the makerspace.
- Spray paint, stains, and other approved items must be stored in the hazardous chemical storage cabinet in the Vented Room.
- Please DO NOT paint indoors.
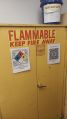
Flammables Cabinet
in the Vented Room

Other Hazards
- Avoid placing uncovered (extension) cords, hoses, cables, or wires across the floors of our shops.
Impairment
- The use of PPM equipment requires you to be alert, attentive, and focused.
- Do not use any PPM work area, or any PPM tools, if you are under the influence of drugs or alcohol.
Classes
- PPM announces its Upcoming events, including classes, on Meetup
- To help out in the Powder Coating Area contact us on Slack.
Training
- How to Powder Coat — Eastwood
- POWDER COATING COLLECTIONS — PRISMATIC POWDERS
Part prep
- Max part size to powder coat is 36"x45"x91"
- Remove anything off the part that can’t handle 400°F
- Part must be clean and degreased to prevent contamination of media
- Sandblasting part first gives more grip for the powder to stick to and last longer
- If the part has been sandblasted, bake the part in the oven at 180°F until the part reaches temp to degas and discharge part. Then allow to cool.
- Tape anything off with high temp tape (PET, Kapton, Fiberglass) that you don’t want to be powered coated
- Once the part is cleaned and discharged do not touch part with your hands
Powder coat gun prep
- Make sure the gun is completely clean by blowing off any powder off and in the gun with air compressor
- Completely clean out all powder from the powder bottle if using a different color
- Only fill bottle 2in, NO MORE. The bottle needs air circulation to work properly.
- Set gun to high voltage for most things for the first coat and use low voltage for very small parts or second coats
- Set gun PSI to 3-5 PSI
Powder coating
- Place part on rack or hang from rack using stainless steel hooks or wire
- Connect ground wire to rack or wire
- Check ground by moving powder coat gun close to part (1-2in) and push power button to verify there electricity aches to the part. If not, adjust ground until you have a strong arch.
- Hold button and spray powder 6-8 inch away in a circular motion around part until the part is evenly coated.
- Start coating the parts that are deep and have 90 degree angles (low voltage may help if it’s not sticking) then coat the rest at high voltage
- Check evenness with led light
- If air from the gun is blowing powder off part PSI is too high
- If the powder is not sticking, the part may have not been cleaned well enough or not discharged enough
- If you mess up or want to restart you can blow off the powder and restart
Baking part
- Preheat oven to the temperature specified for the powder
- Place part in the oven being careful not to knock off any powder from part
- Measure the temp of the part until its at the specified temp for the powder being used (using IR thermometer)
- Once the part has reached temp bake the part for the specified time for the powder being used
- Carefully remove the part from the oven and allow it to cool down before handling
- To add a second coat, coat part hot at 180°F with good ground and on low voltage and rebake
Equipment Lists
Powder Coating Equipment
| Picture | Item | Manufacturer | Power Requirements |
Resources |
powder coating paint gun, dual voltage |
Eastwood | Powder Coating | ||
 |
powder coating
paint booth |
|||
 |
huge (36"x45"91")
powder coating oven with PID controller |
Trevor Banks | ||
Hand Tools
| Picture | Item | Manufacturer | Model Number |
 |
IR thermometer | ||
 |
small clamp | ||
- ☐ Powder Coating Area hand tools should be marked with pink tape or paint or powder coating.
- ☐ Return all tools to their proper location after use. This rule applies to all areas of our Makerspace.
Benefits
- PPM members enjoy discounts at the following local merchants:
- (bring proof of membership)
| Company | Website | Benefit | Directions to |
| Woodcraft of Colorado Springs | 10% discount | 4438 Austin Bluffs Parkway | |
| CO Lumber Specialties | 10% discount | 3636 Stone Avenue | |
| GENERAL AIR | 10% discount | 3031 N Nevada Ave. | |
| ACE Hardware Uintah Gardens | 10% discount | 1830 W Uintah Street | |
- Map of stores that provide PPM member discounts
- Map of helpful local resources curated by our makers
- At home LightBurn subscriptions can be purchased at a discounted rate for being a PPM member.
- The discount code is saved as a Pinned Message in our 'laser-cutter' channel in Slack.
Materials
Powder Coating Powders
| Color | Item | Supplier | Safety Data Sheet | Curing Procedure |
| Sassy Pink | PSS 3063 | PRISMATIC POWDERS | Safety Data Sheet | 20 Minutes at 350°F |
| Neon Green | PSS 1221 | PRISMATIC POWDERS | 10 Minutes at 400°F | |
| Space Dust | PPB 10713 | PRISMATIC POWDERS | 10 Minutes at 400°F | |
| Ink Black | PSS 0106 | PRISMATIC POWDERS | 10 Minutes at 400°F | |
| Flatter Black | ESS 4441 | PRISMATIC POWDERS | 10 Minutes at 400°F | |
| Super Grip Black | PTB 6419 | PRISMATIC POWDERS | 10 Minutes at 350°F | |
| Black | MATTE BLACK, Item 93306 | Harbor Freight | 400°F for 15-20 mins after flowout | |
| Clear | SOFT (SATIN) CLEAR, PPS-1334 | PRISMATIC POWDERS | 10 MIN AT 400° F | |
| White | GLOSS WHITE, PSS-5690 | PRISMATIC POWDERS | 10 MIN AT 400° F | |
| Yellow | 10292 Mirror Yellow | Eastwood Company | 400° F for 20 mins after flowout | |
- Donate for "General Supplies" via PayPal: bit.ly/ppmstuff
- Or, leave donations in a black payment box, or use a QR code.
Policies
Red Tags
- If equipment needs repairs, place a Red Tag on it and report it via the Pikes Peak Makerspace Slack channel #red-tags-issues
- This advises others on the malfunctioning equipment and ensures that actions can be taken to service/repair the equipment.
Additional Help
Links to related PPM Wiki pages:
Use the PPM Slack channel #powder-coating or #metal-shop
Note that we have a Slack channel (#job-board) for members to post, discuss, or accept job opportunities either within PPM or from the community.
Search the PPM Wiki — include Content pages as well as Multimedia.
Contact Us if you cannot find your answer here on our Wiki or if you notice any information that is outdated.