Wood Shop — SawStop table saw: Difference between revisions
| (225 intermediate revisions by 3 users not shown) | |||
| Line 1: | Line 1: | ||
The SawStop table saw in the PPM Wood Shop cannot be turned on without scanning the RFID card of a certified member in our T.E.S.L.A. Access system. | |||
''' | '''Links to related PPM Wiki pages:''' | ||
''' | :[[Wood Shop|<span style="color:#FFFFFF; background:#3DA942"> '''Wood Shop''' </span>]] | ||
Additional training and certification is required to use any of our Level 3 equipment. | :[[Wood Shop — Festool power tools|<span style="color:#FFFFFF; background:#3DA942"> '''Wood Shop — Festool power tools''' </span>]] | ||
<br> | |||
[[File:Level 3 badge.png|alt=Level 3 badge used at Pikes Peak Makerspace|left|frameless|90x90px|PPM TRAINING & CERTIFICATION REQUIRED]] | |||
'''The Wood Shop Area at Pikes Peak Makerspace (PPM) consists of''' '''both Level 2 and Level 3 equipment.''' | |||
Additional PPM training and then PPM certification is required to use any of our Level 3 equipment. | |||
Our trainers are passionate about sharing their knowledge and ensuring a positive learning experience for all. | |||
We are grateful for their commitment and dedication to our community.<br> | |||
<br> | |||
{{Template:Contact Us}} | |||
<hr style="height:2.5px; background:#3DA942;"> | |||
<br> | |||
==SawStop Orientation== | |||
===How to Become Certified at PPM=== | |||
The SawStop is a powerful and precise table saw with advanced safety features. | |||
Therefore, only members who have completed the following are permitted to use our SawStop. | |||
:☐ Be a PPM member in good standing | |||
:☐ Be certified to use the Wood Shop | |||
:☐ Pass the '''[https://forms.gle/rj4KknEj7ZKubrvi8 Wood Shop & SawStop Policy & Safety Quiz]''' | |||
:☐ Attend in-person the Wood Shop Orientation & SawStop Certification ($60). | |||
:{{Template:Classes}} | |||
===Getting Started=== | |||
'''''By using this tool, you accept responsibility for safe operation and agree to pay for brake and blade replacements required due to false activation of the safety system.''''' | |||
<big>'''Before using the SawStop table saw,'''</big> | |||
''' | |||
<big>'''read the [https://www.sawstop.com/wp-content/uploads/2021/10/M_ICS_WEB.pdf SawStop OWNER'S MANUAL] (pdf) and'''</big> | |||
==== | <big>'''become familiar with the saw's controls and features.'''</big> | ||
====<big>Powering on the SawStop</big>==== | |||
*Scan your door card on the T.E.S.L.A. box to enable the saw. | |||
:(Our SawStop table saw will not turn on without scanning the RFID door card of an authorized user.) | |||
*Wait for the ready-to-operate lights to turn green. | |||
*Use the paddle switch to turn on and off the blade. | |||
* | ====<big>Operating PPM's SawStop Table Saw</big>==== | ||
* | *No dado cuts. The SawStop requires a special cartridge which we do not have. | ||
* | *If the brake trips, contact the Wood Shop Captains. | ||
* | *Do not make adjustments to the saw, adjust the fence, or change the blade without shop Captain approval. | ||
*Ensure the blade guards are kept clean and free of debris. | |||
*Ensure dust collection is unclogged and functional. | |||
*Report any damage or issues immediately. | |||
====<big>After use</big>==== | |||
:☐ Drop the SawStop blade into the cabinet | |||
:☐ Clean the SawStop | |||
:☐ Log off our T.E.S.L.A. system | |||
====<big>Operating any Table Saw</big>==== | |||
*Make sure you have no loose clothing, jewelry, or hair that will be anywhere near the blade. | |||
*Always wear appropriate personal protective equipment, including eye and ear protection, and a dust mask. | |||
*Always use the blade guard and splitter (riving knife) to keep the wood from binding and kicking back during the cut. | |||
*Always be familiar with the location of the Emergency Stop Button, and practice reaching for it from your cutting stance to commit the motion to muscle memory. | |||
*Always ensure the saw is off before making any adjustments to angle or height of the blade. | |||
*Always use the folding outfeed table when ripping plywood or long stock. | |||
*Always use push sticks and push blocks to keep your hands at least 4" away from the blade. | |||
*Never reach over the blade or make contact with the blade while it is in motion. | |||
*Never use the zero clearance insert on angled cuts. It is for 90 degree cuts only. | |||
*Never use the miter gauge and the rip fence at the same time. | |||
*Keep the blade height set between 1/8 to 1/4 inch above the workpiece. | |||
*Do not cut too close to the fence. | |||
====Avoiding Kickback==== | |||
*Kickback can occur when ripping boards. Keep to one side of the blade or other depending on the cut you are making. Stay away from standing directly behind the blade. | |||
*You must always use the rip fence, miter gauge, or crosscut sled. Absolutely no free cuts with the tablesaw. | |||
*Use the blade guards and riving knife. | |||
*Miter gauge must be used on the right of the blade when bevel cutting. | |||
====Cleaning up and Shutdown==== | |||
* | *Cleaning the saw | ||
* | **Remove insert and clean around the blade with compressed air. | ||
* | **Open the access panels (one on each side) and inspect the cabinet for saw dust. | ||
* | ***Clean the cabinet with a shop-vac as necessary. | ||
* | **Ensure dust collection is unclogged and functional. | ||
* | ***This can require disconnecting the 4" dust collection hose and shaking it out. | ||
* | ***Ensure blade access panel and dust door is closed (the one with the magnet). If left open, sawdust will fill the cabinet. | ||
* Don’t | *Inspect blade, and notify shop Captain if the blade needs to be cleaned. | ||
* | *Dust off the surface and clean around the base after each use. | ||
* | *Don’t leave any scraps - dispose of them in the bin or dumpster. | ||
*Put all accessories (moisture meter, metal detector, miter gauge) back in the appropriate location. | |||
*The SawStop should be perfectly clean and ready for the next user when you are done. | |||
* | *Log out and clean up after each use or risk losing access to the saw. | ||
====SawStop Captain Duties==== | |||
=====Maintenance Inspections===== | |||
*Keep the saw's blade and guards clean and free of debris to ensure optimal performance and safety. | |||
*Check the tightness of all bolts, screws, and other fasteners regularly to ensure that the saw remains securely in place. | |||
*Replace worn or damaged parts as soon as possible to maintain the saw's performance and safety. | |||
*Regularly inspect the saw for any signs of wear, damage, or other issues that could impact its performance or safety. | |||
* | =====Hands-on SawStop certification===== | ||
* | Instructors of the hands-on SawStop certification will cover: | ||
* | * | ||
* | * | ||
* | |||
* | |||
* | |||
* | |||
*How to check material for conductivity and avoid false triggers. | |||
*How to use the normal blade guard for rips and crosscuts. | |||
*How to install the riving knife for non-thru cuts or rabbets. | |||
* | *The limit rod should remain on the blade guard. | ||
* | *The kickback pawls can be enabled or disabled depending on your needs. | ||
* | *The blade height should be set so that the blade is 1/8 to 1/4 inch above the wood piece. | ||
==SawStop Flesh Detection == | ==SawStop Flesh Detection== | ||
The 5HP SawStop Industrial Cabinet Saw is a high-quality saw that is designed for safety and performance. | |||
It features a flesh detection technology that can quickly stop the blade in the event of accidental contact with a user's skin. | It features a flesh detection technology that can quickly stop the blade in the event of accidental contact with a user's skin. | ||
* In the event of flesh detection, a single use cartridge fires and seizes the blade before | *In the event of flesh detection, a single use cartridge fires and seizes the blade before the user is injured. | ||
* Both the cartridge and blade must be replaced before the SawStop can be used again. | *Both the cartridge and blade must be replaced before the SawStop can be used again. | ||
===Avoiding False Triggers=== | |||
Although uncommon, it is possible to have a false flesh detection. | |||
'''Users are responsible for the expense of brake and blade replacements required due to false activation of the safety system (about $150).''' | |||
False triggers are caused by conductivity. One way to check if your material is conductive is to hold it against the blade with the saw off and look at the indication lights. If red, it will trigger the blade brake. If green, that part of the material is unlikely to trigger. | |||
#'''Moisture in the Wood''' can cause false triggers in the SawStop's flesh detection technology. To avoid false triggers from moisture, it's important to properly test the moisture content of the wood before cutting and to ensure that the moisture content is below 10%. Here are the steps to properly test the moisture content. | |||
# '''Moisture in the Wood''' can cause false triggers in the SawStop's flesh detection technology. To avoid false triggers from moisture, it's important to properly test the moisture content of the wood before cutting and to ensure that the moisture content is below 10%. Here are the steps to properly test the moisture content. | ##'''Use the moisture meter:''' You will need a moisture meter to accurately measure the moisture content of the wood. There are a variety of moisture meters available, ranging from simple pin-style meters to more advanced meters with digital displays. | ||
## Use the moisture meter: You will need a moisture meter to accurately measure the moisture content of the wood. There are a variety of moisture meters available, ranging from simple pin-style meters to more advanced meters with digital displays. | ##'''Test several locations:''' It's important to test several locations on the piece of wood, as the moisture content can vary from one area to another. Aim to test at least 3-4 different spots on each piece of wood. | ||
## Test several locations: It's important to test several locations on the piece of wood, as the moisture content can vary from one area to another. Aim to test at least 3-4 different spots on each piece of wood. | ##'''Take readings:''' Place the moisture meter probe on the surface of the wood and take a reading. Repeat this process for each of the test locations. | ||
## Take readings: Place the moisture meter probe on the surface of the wood and take a reading. Repeat this process for each of the test locations. | ##'''Evaluate the results:''' Compare the readings from each location to determine the average moisture content of the wood. Ideally, the moisture content should be below 10% to reduce the likelihood of a false trigger. If the moisture content is higher than 10%, allow the wood to dry out further before cutting it on the SawStop table saw. | ||
## Evaluate the results: Compare the readings from each location to determine the average moisture content of the wood. Ideally, the moisture content should be below 10% to reduce the likelihood of a false trigger. If the moisture content is higher than 10%, allow the wood to dry out further before cutting it on the SawStop table saw. | ##*It's important to note that moisture meters are not foolproof and can sometimes give inaccurate readings. However, they are still a valuable tool for monitoring the moisture content of wood and reducing the risk of false triggers. | ||
##* It's important to note that moisture meters are not foolproof and can sometimes give inaccurate readings. However, they are still a valuable tool for monitoring the moisture content of wood and reducing the risk of false triggers. | ##*By properly testing the moisture content of the wood before cutting and ensuring that the moisture content is below 10%, you can reduce the likelihood of a false trigger due to moisture and ensure a safe and successful cutting experience with the SawStop table saw. | ||
##* By properly testing the moisture content of the wood before cutting and ensuring that the moisture content is below 10%, you can reduce the likelihood of a false trigger due to moisture and ensure a safe and successful cutting experience with the SawStop table saw. | #'''Laser-Cut/Engraved Wood''' can cause false triggers and should not be used on the SawStop table saw. The carbon is conductive and can trigger the cartridge | ||
# '''Laser-Cut/Engraved Wood''' can cause false triggers and should not be used on the | #'''Treated Lumber''' can cause a false trigger because of the copper used in the treatment. | ||
# '''Treated Lumber''' can cause a false trigger because of the copper used in the | #'''Metal''' - Hitting a nail, screw, or staple will trigger the cartridge and you are responsible for the $150 replacement cost. Use the metal detection wand to ensure there is no metal in your wood! However, this is no guarantee as non-ferrous metals like aluminum (or insulating Styrofoam with an aluminum foil lining, for example) can trigger the SawStop's flesh detection system. | ||
=== | ==='''Watch these (8) videos on YouTube'''=== | ||
:[https://www. | :☐ [https://www.youtube.com/watch?v=qSbS5zhH7cE&t=0s '''Table Saw Basics #1- Safety: Table Saw Basics #1 Safety'''] (13 min) | ||
:☐ SawStop Safety Features - [https://www.youtube.com/watch?v=j1ANn1CTAxQ '''WOOD magazine'''] (5 min) | |||
:☐ [https://www.youtube.com/watch?v=tOylRB8wq2c '''Table Saw Fundamentals on Your SawStop Table Saw'''] (9 min) | |||
:☐ Table Saw Basics #2- [https://www.youtube.com/watch?v=bADmnDEcuYo '''Rip Cuts'''] (11 min) | |||
:☐ Table Saw Basics #3- [https://www.youtube.com/watch?v=o8ok1h0gJ5o&t=0s '''Crosscuts'''] (12 min) | |||
:☐ Table Saw Basics #4- [https://www.youtube.com/watch?v=7aZCdt8Cs8M&t=0s '''Miters & Bevels'''] (10 min) | |||
:☐ Table Saw Basics #5- [https://www.youtube.com/watch?v=71UenL74k2E&t=0s '''Working with Plywood'''] (8 min) | |||
:☐ [https://www.youtube.com/watch?v=0J1pRBiVKbI&t=0s '''Saw Blade Tutorial'''] (8 min) | |||
=== | ===Additional Resources=== | ||
: | '''Links to member-recommended pages:''' | ||
:☐ [https://www.sawstop.com/why-sawstop/faqs/ '''FAQS'''] — Frequently Asked Questions (FAQs) | |||
:☐ [https://www.sawstop.com/how-tos/tips-tricks/ '''TIPS & TRICKS'''] — tips & tricks, I guess | |||
:☐ '''[https://www.woodcraft.com/blogs/wood/toxic-woods Toxic Woods]''' — on WOODCRAFT.com | |||
==Equipment List== | ==Equipment List== | ||
===SawStop Equipment List=== | ===SawStop Equipment List=== | ||
{| class="wikitable | {| class="wikitable" | ||
|- style="font-weight:bold; text-align: | |- style="font-weight:bold; text-align:left; font-family:Arial, Helvetica, sans-serif !important;; background-color:#3DA942; color:#ffffff;" | ||
| | |Picture | ||
| | |Item | ||
|Model<br>Number | |||
| | |||
|Power<br>Requirements | |Power<br>Requirements | ||
| | |Resources | ||
|- | |- | ||
|[[File:SawStop | |[[File:SawStop cabinet.jpeg|alt=SawStop cabinet at PPM|center|frameless|175x175px]] | ||
|'''SawStop''' | |'''SawStop''' | ||
'''10" Industrial''' | '''5HP, 10" Industrial''' | ||
'''Cabinet Saw''' | '''Cabinet Saw''' | ||
[[File:Level 3 badge.png|alt=Level 3 badge|left|frameless| | [[File:Level 3 badge.png|alt=Level 3 badge|left|frameless|45x45px|link=https://wiki.pikespeakmakerspace.org/index.php/File:Level_3_badge.png]] | ||
|ICS53480 | |ICS53480 | ||
|Three Phase | |Three Phase | ||
480v | |||
|[https://www.youtube.com/@sawstop '''SawStop on YouTube'''] | |[https://www.youtube.com/@sawstop '''SawStop on YouTube'''] | ||
|- | |- | ||
| | | | ||
| | |||
| | | | ||
| | | | ||
| | | | ||
| | |- | ||
| | | | ||
| | |'''SawStop''' | ||
|} | '''FOLDING OUTFEED TABLE''' | ||
|TSA-FOT | |||
|not applicable | |||
|'''[https://www.sawstop.com/product/folding-outfeed-table-tsa-fot/ product page]''' | |||
|- style="font-weight:bold; text-align:left; font-family:Arial, Helvetica, sans-serif !important;" | |||
| | |||
| | |||
| | |||
| | |||
| | |||
|} | |||
<gallery widths="200" heights="125"> | |||
File:SawStop underside.jpeg|alt=SawStop: Access underside from the right side|'''SawStop: ''Access underside from the right side for inspection and cleaning of components.''''' | |||
File:SawStop internals.jpeg|alt=SawStop: Internal “cabinet” requires regular inspections|'''SawStop: ''Internal “cabinet” requires regular inspections to ensure built in dust collection hoses are connected and working correctly.''''' | |||
</gallery> | |||
:☐ Return all tools to their proper location after use. This rule applies to all areas of our Makerspace. | |||
: | |||
==Benefits | ==Benefits== | ||
{{Member Benefits}} | {{Member Benefits}} | ||
== | ==Policies== | ||
===Materials=== | ===Materials=== | ||
:''' | :'''To donate for "Sheet Goods" use the Optix app.''' | ||
=== | ===Red Tags=== | ||
*Use a Red Tag, which can be found in the red tag area, to designate the broken equipment. | |||
*Additionally, report the issue in our Slack channel #red-tag-issues. | |||
== | ==Additional Help== | ||
Use the PPM Slack channel #wood-shop | |||
Note that we have a Slack channel (#job-board) for members to post, discuss, or accept job opportunities either within PPM or from the community. | |||
{{Template:Footer}} | {{Template:Footer}} | ||
<hr style="height:2.5px; background:#3DA942;"> | |||
Latest revision as of 17:55, 21 June 2026
The SawStop table saw in the PPM Wood Shop cannot be turned on without scanning the RFID card of a certified member in our T.E.S.L.A. Access system.
Links to related PPM Wiki pages:

The Wood Shop Area at Pikes Peak Makerspace (PPM) consists of both Level 2 and Level 3 equipment.
Additional PPM training and then PPM certification is required to use any of our Level 3 equipment.
Our trainers are passionate about sharing their knowledge and ensuring a positive learning experience for all.
We are grateful for their commitment and dedication to our community.
Contact Us if you cannot find your answer here on our Wiki or if you notice any outdated information.
SawStop Orientation
How to Become Certified at PPM
The SawStop is a powerful and precise table saw with advanced safety features.
Therefore, only members who have completed the following are permitted to use our SawStop.
- ☐ Be a PPM member in good standing
- ☐ Be certified to use the Wood Shop
- ☐ Pass the Wood Shop & SawStop Policy & Safety Quiz
- ☐ Attend in-person the Wood Shop Orientation & SawStop Certification ($60).
Getting Started
By using this tool, you accept responsibility for safe operation and agree to pay for brake and blade replacements required due to false activation of the safety system.
Before using the SawStop table saw,
read the SawStop OWNER'S MANUAL (pdf) and
become familiar with the saw's controls and features.
Powering on the SawStop
- Scan your door card on the T.E.S.L.A. box to enable the saw.
- (Our SawStop table saw will not turn on without scanning the RFID door card of an authorized user.)
- Wait for the ready-to-operate lights to turn green.
- Use the paddle switch to turn on and off the blade.
Operating PPM's SawStop Table Saw
- No dado cuts. The SawStop requires a special cartridge which we do not have.
- If the brake trips, contact the Wood Shop Captains.
- Do not make adjustments to the saw, adjust the fence, or change the blade without shop Captain approval.
- Ensure the blade guards are kept clean and free of debris.
- Ensure dust collection is unclogged and functional.
- Report any damage or issues immediately.
After use
- ☐ Drop the SawStop blade into the cabinet
- ☐ Clean the SawStop
- ☐ Log off our T.E.S.L.A. system
Operating any Table Saw
- Make sure you have no loose clothing, jewelry, or hair that will be anywhere near the blade.
- Always wear appropriate personal protective equipment, including eye and ear protection, and a dust mask.
- Always use the blade guard and splitter (riving knife) to keep the wood from binding and kicking back during the cut.
- Always be familiar with the location of the Emergency Stop Button, and practice reaching for it from your cutting stance to commit the motion to muscle memory.
- Always ensure the saw is off before making any adjustments to angle or height of the blade.
- Always use the folding outfeed table when ripping plywood or long stock.
- Always use push sticks and push blocks to keep your hands at least 4" away from the blade.
- Never reach over the blade or make contact with the blade while it is in motion.
- Never use the zero clearance insert on angled cuts. It is for 90 degree cuts only.
- Never use the miter gauge and the rip fence at the same time.
- Keep the blade height set between 1/8 to 1/4 inch above the workpiece.
- Do not cut too close to the fence.
Avoiding Kickback
- Kickback can occur when ripping boards. Keep to one side of the blade or other depending on the cut you are making. Stay away from standing directly behind the blade.
- You must always use the rip fence, miter gauge, or crosscut sled. Absolutely no free cuts with the tablesaw.
- Use the blade guards and riving knife.
- Miter gauge must be used on the right of the blade when bevel cutting.
Cleaning up and Shutdown
- Cleaning the saw
- Remove insert and clean around the blade with compressed air.
- Open the access panels (one on each side) and inspect the cabinet for saw dust.
- Clean the cabinet with a shop-vac as necessary.
- Ensure dust collection is unclogged and functional.
- This can require disconnecting the 4" dust collection hose and shaking it out.
- Ensure blade access panel and dust door is closed (the one with the magnet). If left open, sawdust will fill the cabinet.
- Inspect blade, and notify shop Captain if the blade needs to be cleaned.
- Dust off the surface and clean around the base after each use.
- Don’t leave any scraps - dispose of them in the bin or dumpster.
- Put all accessories (moisture meter, metal detector, miter gauge) back in the appropriate location.
- The SawStop should be perfectly clean and ready for the next user when you are done.
- Log out and clean up after each use or risk losing access to the saw.
SawStop Captain Duties
Maintenance Inspections
- Keep the saw's blade and guards clean and free of debris to ensure optimal performance and safety.
- Check the tightness of all bolts, screws, and other fasteners regularly to ensure that the saw remains securely in place.
- Replace worn or damaged parts as soon as possible to maintain the saw's performance and safety.
- Regularly inspect the saw for any signs of wear, damage, or other issues that could impact its performance or safety.
Hands-on SawStop certification
Instructors of the hands-on SawStop certification will cover:
- How to check material for conductivity and avoid false triggers.
- How to use the normal blade guard for rips and crosscuts.
- How to install the riving knife for non-thru cuts or rabbets.
- The limit rod should remain on the blade guard.
- The kickback pawls can be enabled or disabled depending on your needs.
- The blade height should be set so that the blade is 1/8 to 1/4 inch above the wood piece.
SawStop Flesh Detection
The 5HP SawStop Industrial Cabinet Saw is a high-quality saw that is designed for safety and performance.
It features a flesh detection technology that can quickly stop the blade in the event of accidental contact with a user's skin.
- In the event of flesh detection, a single use cartridge fires and seizes the blade before the user is injured.
- Both the cartridge and blade must be replaced before the SawStop can be used again.
Avoiding False Triggers
Although uncommon, it is possible to have a false flesh detection.
Users are responsible for the expense of brake and blade replacements required due to false activation of the safety system (about $150).
False triggers are caused by conductivity. One way to check if your material is conductive is to hold it against the blade with the saw off and look at the indication lights. If red, it will trigger the blade brake. If green, that part of the material is unlikely to trigger.
- Moisture in the Wood can cause false triggers in the SawStop's flesh detection technology. To avoid false triggers from moisture, it's important to properly test the moisture content of the wood before cutting and to ensure that the moisture content is below 10%. Here are the steps to properly test the moisture content.
- Use the moisture meter: You will need a moisture meter to accurately measure the moisture content of the wood. There are a variety of moisture meters available, ranging from simple pin-style meters to more advanced meters with digital displays.
- Test several locations: It's important to test several locations on the piece of wood, as the moisture content can vary from one area to another. Aim to test at least 3-4 different spots on each piece of wood.
- Take readings: Place the moisture meter probe on the surface of the wood and take a reading. Repeat this process for each of the test locations.
- Evaluate the results: Compare the readings from each location to determine the average moisture content of the wood. Ideally, the moisture content should be below 10% to reduce the likelihood of a false trigger. If the moisture content is higher than 10%, allow the wood to dry out further before cutting it on the SawStop table saw.
- It's important to note that moisture meters are not foolproof and can sometimes give inaccurate readings. However, they are still a valuable tool for monitoring the moisture content of wood and reducing the risk of false triggers.
- By properly testing the moisture content of the wood before cutting and ensuring that the moisture content is below 10%, you can reduce the likelihood of a false trigger due to moisture and ensure a safe and successful cutting experience with the SawStop table saw.
- Laser-Cut/Engraved Wood can cause false triggers and should not be used on the SawStop table saw. The carbon is conductive and can trigger the cartridge
- Treated Lumber can cause a false trigger because of the copper used in the treatment.
- Metal - Hitting a nail, screw, or staple will trigger the cartridge and you are responsible for the $150 replacement cost. Use the metal detection wand to ensure there is no metal in your wood! However, this is no guarantee as non-ferrous metals like aluminum (or insulating Styrofoam with an aluminum foil lining, for example) can trigger the SawStop's flesh detection system.
Watch these (8) videos on YouTube
- ☐ Table Saw Basics #1- Safety: Table Saw Basics #1 Safety (13 min)
- ☐ SawStop Safety Features - WOOD magazine (5 min)
- ☐ Table Saw Fundamentals on Your SawStop Table Saw (9 min)
- ☐ Table Saw Basics #2- Rip Cuts (11 min)
- ☐ Table Saw Basics #3- Crosscuts (12 min)
- ☐ Table Saw Basics #4- Miters & Bevels (10 min)
- ☐ Table Saw Basics #5- Working with Plywood (8 min)
- ☐ Saw Blade Tutorial (8 min)
Additional Resources
Links to member-recommended pages:
- ☐ FAQS — Frequently Asked Questions (FAQs)
- ☐ TIPS & TRICKS — tips & tricks, I guess
- ☐ Toxic Woods — on WOODCRAFT.com
Equipment List
SawStop Equipment List
| Picture | Item | Model Number |
Power Requirements |
Resources |
 |
SawStop
5HP, 10" Industrial Cabinet Saw  |
ICS53480 | Three Phase
480v |
SawStop on YouTube |
| SawStop
FOLDING OUTFEED TABLE |
TSA-FOT | not applicable | product page | |
-
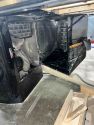 SawStop: Access underside from the right side for inspection and cleaning of components.
 -
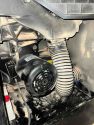 SawStop: Internal “cabinet” requires regular inspections to ensure built in dust collection hoses are connected and working correctly.


- ☐ Return all tools to their proper location after use. This rule applies to all areas of our Makerspace.
Benefits
- PPM members enjoy discounts at the following local merchants:
- (bring proof of PPM membership)
| Website | Benefit | Address |
|---|---|---|
| Woodcraft of Colorado Springs | 10% discount | 4438 Austin Bluffs Parkway |
| CO Lumber Specialties | 10% discount | 3636 Stone Avenue |
| GENERAL AIR | 10% discount | 3031 N Nevada Ave. |
| ACE Hardware Uintah Gardens | 10% discount | 1830 W Uintah Street |
Policies
Materials
- To donate for "Sheet Goods" use the Optix app.
Red Tags
- Use a Red Tag, which can be found in the red tag area, to designate the broken equipment.
- Additionally, report the issue in our Slack channel #red-tag-issues.
Additional Help
Use the PPM Slack channel #wood-shop
Note that we have a Slack channel (#job-board) for members to post, discuss, or accept job opportunities either within PPM or from the community.
Search the PPM Wiki — include Content pages as well as Multimedia.
Contact Us if you cannot find your answer here on our Wiki or if you notice any outdated information.